I’ve been working on getting to a video about installing OpenMediaVault on a Raspberry Pi for a while now and even went so far as to download the files I would need for the video and put them on my desktop for safe keeping and a little reminder to hurry up and make the video.
This morning I decided to finally make the video. I went back through some online resources and realized they had changed the entire process when they released version 5 of OpenMediaVault.
Makes me glad that I didn’t make that video sooner.
In order to setup an OpenMediaVault Raspberry Pi server, you’re going to need a few things:
- Raspberry Pi 3 or 4 with a proper power supply
- Micro SD Card – 8GB or more with USB Adapter
- Ethernet Cable is preferable for network access
- External USB Hard Drive that you’re okay formatting / erasing
- A Computer – I’m using a Windows 10 PC
- SSH program like Putty
Once you’ve gathered all that, you’re set to go.
Getting Started
Download Raspian Lite for your Raspberry Pi.
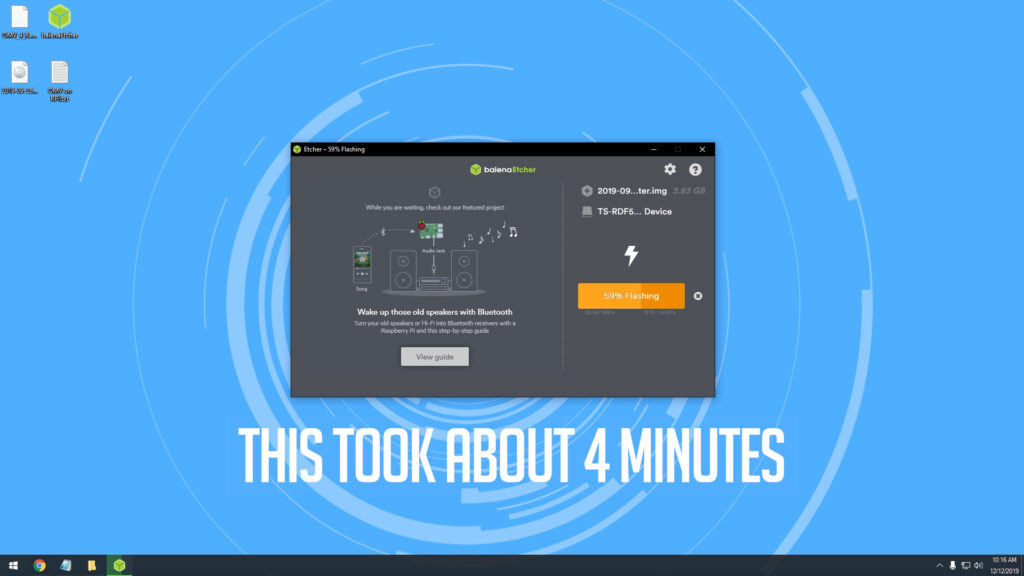
Download Etcher.
Plug your Micro SD card into your computer and open Etcher.
In Etcher, select the Raspbian Lite image file, then select your Micro SD Card, then click “Flash”.
Once Etcher has written and verified everything, unplug the Micro SD card reader and then plug it back in. Then, open your file explorer and look for the drive labeled “boot”. Open that drive and right click inside the windows and click “Create new text file”. Name the file “ssh” (without quotes) and make sure to remove the .txt from the file name. Windows will ask if you’re sure you want to change the file extension. Click “Yes”.
Initial Setup
Unplug the Micro SD card reader, remove the Micro SD card from it and then plug it into your Raspberry Pi. Make sure that your network cable is plugged in and then plug in the power cable to power on your Raspberry Pi.
Now you’ll want to wait a few minutes to give the Raspberry Pi a few minutes to boot up and get settled. While this is happening, login to your router and find the Raspberry Pi’s IP address. You’re going to need that for the rest of the setup process.
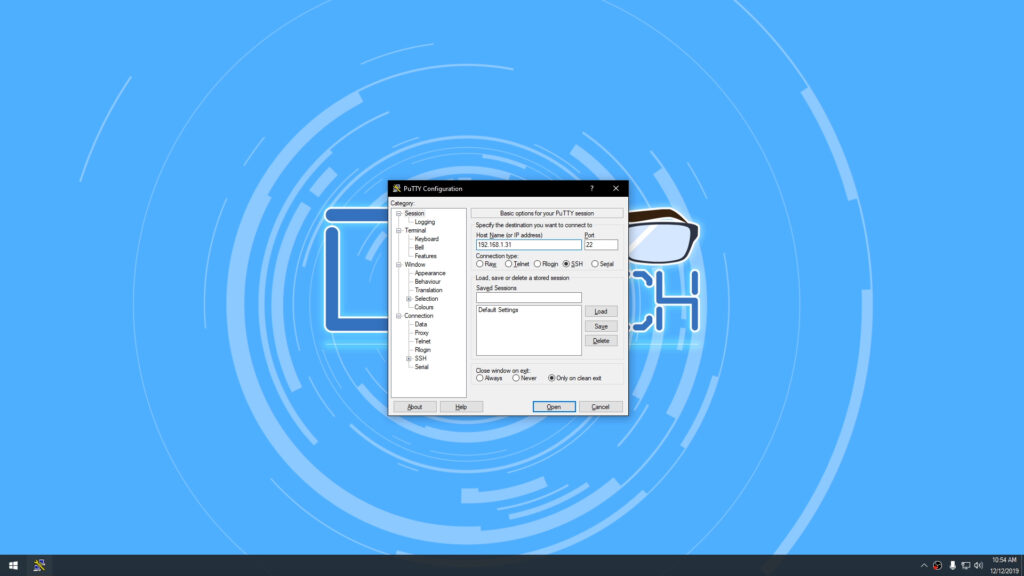
Once you’ve got the IP address and you’ve given the Raspberry Pi time to boot, open an SSH program like Putty. Type in the IP address in the “Host Name” field. Leave the port set to 22.
Click the “Open” button at the bottom of the program.
Click “Yes” on the Putty Security Alert.
A terminal window will pop up asking you to login. The username is “pi” and the password is “raspberry”. Just enter the username and password without the quotes. Any time you’re typing in a password, you won’t see any asterisks or anything. Just type your password and press Enter.
Next, you’ll want to change the “raspberry” password to something more secure. To do that, type “passwd” in the terminal window. It will ask you to enter the current password. Type in “raspberry” (again, without quotes) and press Enter. It will then ask you to enter your new password. Do that and press Enter. It will then ask you to re-enter your new password. Do that and press Enter.
Now it’s time to work on making sure that Raspian is full updated. In the terminal window, type:
sudo apt-get update
Let the system complete. When you’ve got a blinking cursor, type the following:
sudo apt-get upgrade
This may take several minutes, so let it run until you get back to a blinking cursor. Then type:
sudo reboot
This will reboot your Raspberry Pi and close your Putty connection. Wait a couple of minutes and the open Putty and login like you did before with your new password.
Add Pi User to SSH

Next, you’ll add the “pi” user to the SSH group with this command:
sudo adduser pi ssh
Install OpenMediaVault
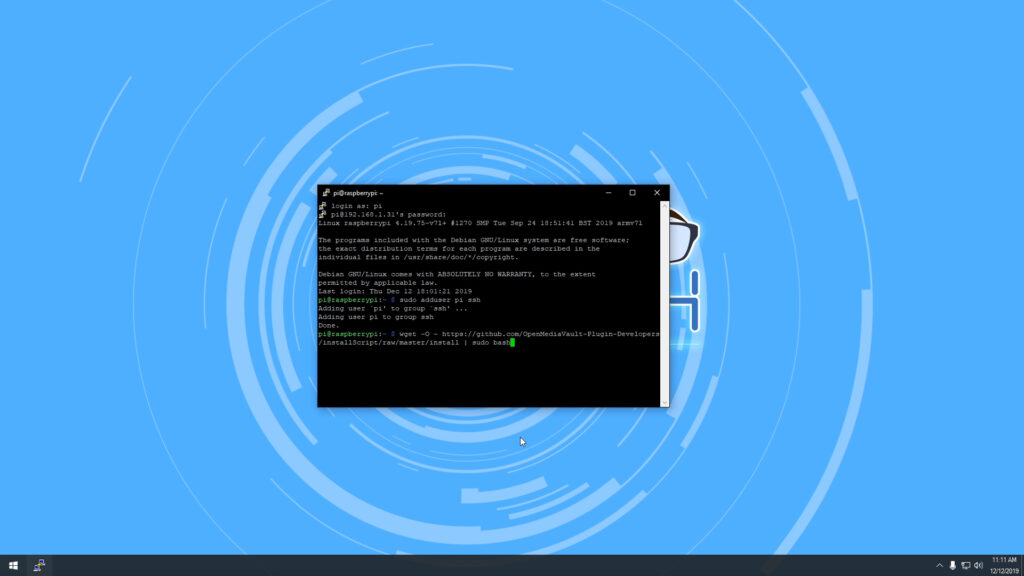
Once that’s complete, you’re going to download and execute a file from Github that will install and configure the OpenMediaVault server software. That script is this:
wget -O - https://github.com/OpenMediaVault-Plugin-Developers/installScript/raw/master/install | sudo bash
This process may take a while depending on your internet connection and what version Raspberry Pi you’ve got. It took me about 15 minutes to complete this, but understand that it could take upwards of 30 minutes.
Once the script has run and completed, reboot the Raspberry Pi:
sudo reboot
At this point, you can plug in your external USB hard drive.
Post Continues After This Ad Break:
Ad Break

Donations help me keep the channel running
Post Continues Here:
First Login
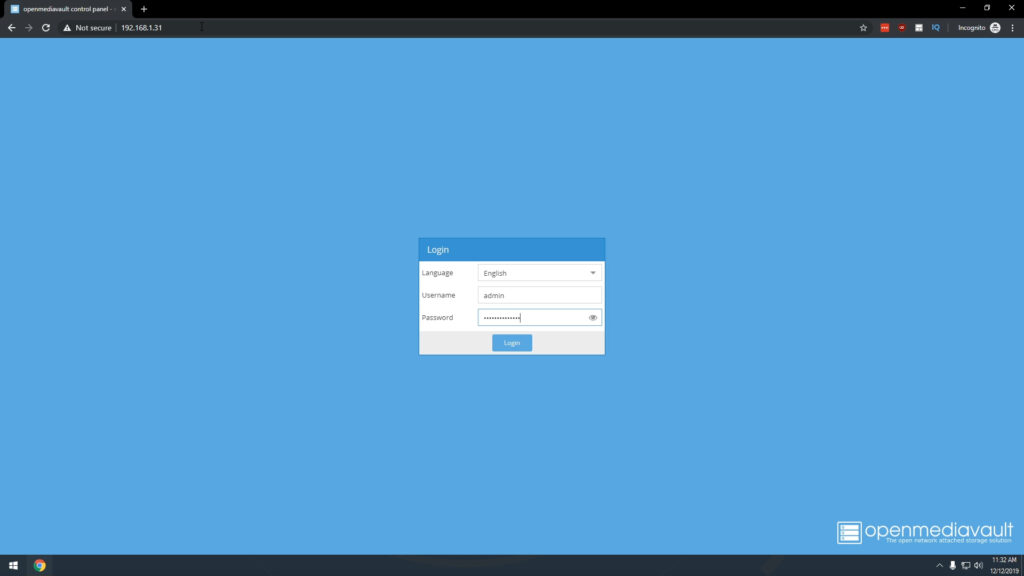
Again, give the Raspberry Pi a couple of minutes to reboot and settle in, then open a web browser like Chrome. In the address bar, type in the IP Address of the Raspberry Pi and press Enter.
This should bring up an OpenMediaVault login screen. The username is “admin” and the default password is “openmediavault” (again without quotes).
There are a couple of things you’ll want to do as soon as you’re signed in for the first time.
First, change the “Auto Logout” setting by clicking “General Settings” under “System” in the left column. Then change the setting from 5 minutes to something like 30 or 60 minutes and then clicking “Save”. Then you’ll see a yellow bar across the top of the page that asks you to “Apply” or “Revert”. Click “Apply”. It may take a minute or 2 for the update to save.
Next, you’ll want to change the Web Administrator Password under “System > General Settings > Web Administrator Password”. Enter your new password in each field and click “Save” and then “Apply” in the yellow bar that appears at the top of the page.
Adding Storage
Now that you have the login stuff taken care of, it’s time to add your storage.
In the left column, look for “Storage”. “Disks” should be the first option under that. Click “Disks”. Select your USB hard drive from the list on the right and then click the “Wipe” button and confirm that you want to wipe the disk. When the process is complete, click the “Done” button.
Next, click “File Systems” in the left column. In the main area of the page, click the “Create” button.
In the “Device” dropdown, select your USB hard drive. Give the device a Label. I called mine “Files”. Then click “OK”. The page will ask if you want to format the device. Click “Yes”. The format process will take a minute or two depending on your hard drive size and if you’re on USB 2.0 or 3.0. Once the process is complete, click “Close”.
Select the newly formated USB hard drive and then click the “Mount” button. Then click “Apply” in the yellow bar at the top of the page.
Saving/applying may take a minute or 2, so be patient.
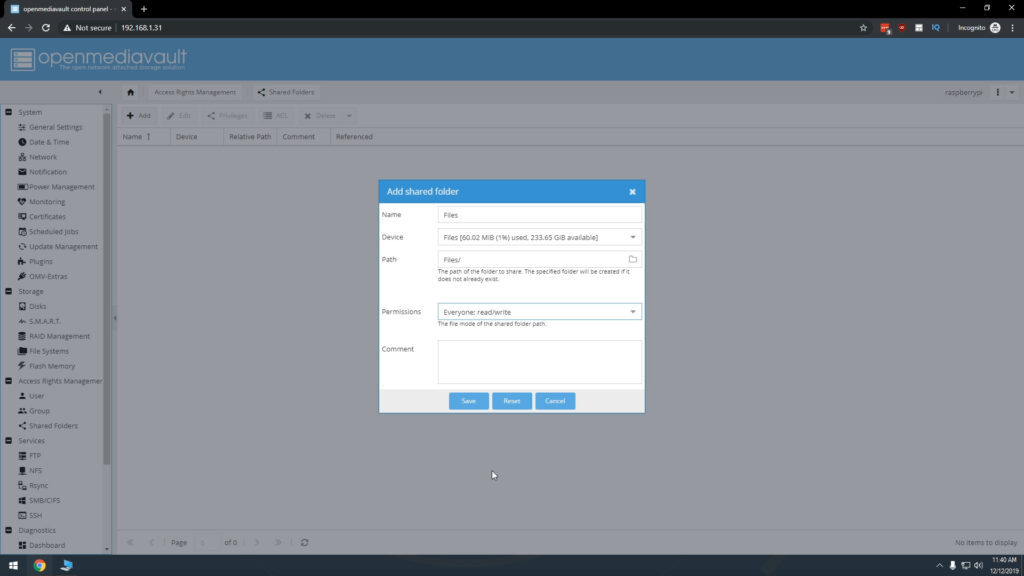
In the left column under “Access Rights Management” click “Shared Folders”.
Click “Add” and then give the Shared folder a name and select the shared file system you just created in the previous step. The Path will auto-fill with the name you just gave the Shared folder.
Set the “Permissions” to “Everyone: read/write” and click “Save”. Then click “Apply” in the yellow bar at the top of the page.
Next, under “Services” select the appropriate type of share for your network type. Because I’ve got an all Windows network, I’ll select “SMB/CFIS”. Once you’ve selected that, make sure that under “General Settings” the “Enable” option is green. If it’s not, click it so that it is and then click “Save” and then click “Apply” in the yellow bar at the top of the page.
Click the “Shares” tab in the blue bar at the top of the page and click “Add”.
Make sure the share is Enabled and then click the dropdown arrow and select the Shared folder you created earlier. Where it says “Public” change the setting from “No” to “Only guests” and click “Save”. Then click “Apply” in the yellow bar at the top of the page.
Saving/applying may take a minute or 2, so be patient.
At this point, you’ve done everything you need to do in order to setup a shared folder that has fully open access. To test this, we’ll go back to our Windows machine and open the file manager. In the address bar of the file manager, type this:
\\192.168.1.xx (be sure to enter your Raspberry Pi's IP address here)
Then press Enter.
You should then see the shared folder you created. Open that folder and then start dragging files into it from your Documents or Desktop or wherever to make sure that everything is working as expected.
That’s it! You’ve setup your own Raspberry Pi OpenMediaVault Network Attached Storage device.
/=========================================/
Buy Parts on Amazon
Raspberry Pi 4 Max: https://amzn.to/34hHZm1
Hard Drive Enclosure: https://amzn.to/2LRtsag
Hard Drive: https://amzn.to/2PLegMP
/=========================================/
Music
Song: Next Level
Artist: SchemezMusic
YouTube URL: https://www.youtube.com/watch?v=Cl4STzKuNTs
SoundCloud: https://soundcloud.com/user-557502422-986552429
Twitter: https://twitter.com/SchemezM
/=========================================/
Here’s my Amazon Influencer Shop Link:
Amazon: https://dbte.ch/amazonshop
/=========================================/
Like what I do? Want to be generous and help support my channel? Here are some ways to support:
Patreon: https://dbte.ch/patreon
Ko-fi: https://dbte.ch/kofi
/=========================================/
Remember to leave a like on this video and subscribe if you want to see more!
/=========================================/
Follow Me:
Twitter: https://dbte.ch/tw
Facebook: https://dbte.ch/fb
Subscribe: https://dbte.ch/ytsub
#RaspberryPi #openmediavault #canakit