In this post we’re going to continue looking at the Turing Pi. Specifically in this video we’re going to flash compute units and get a swarm up and running. I’d like to give another shoutout to Turing Pi for sending the board and the compute units over for me to take a look at.
If you want to get your own Turing PI, check out this link (affiliate link) and get 10% off your order!!
Flashing Compute Units
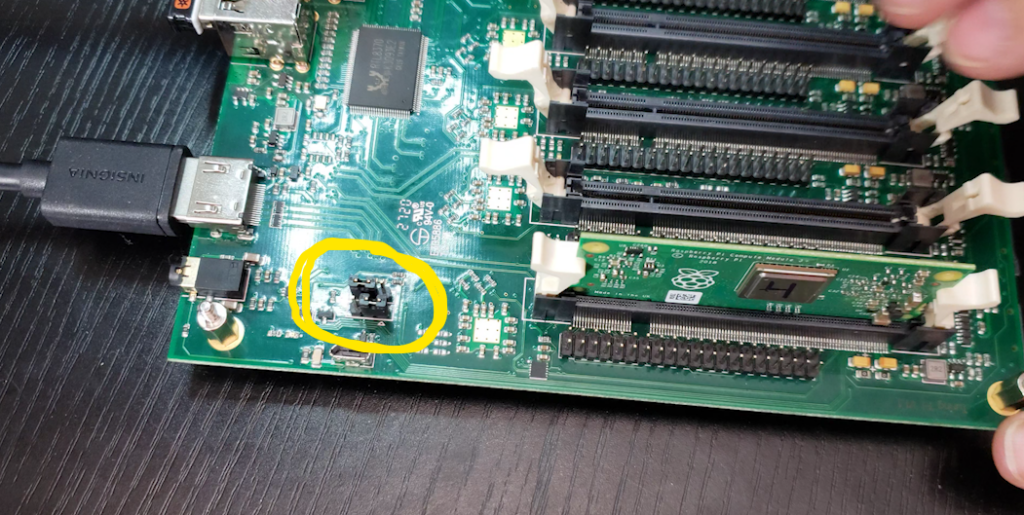
To flash an eMMC compute unit, you’ll need to plug the compute unit into the first slot of the Turing Pi. Make sure that the jumpers next to the slot are staggered.

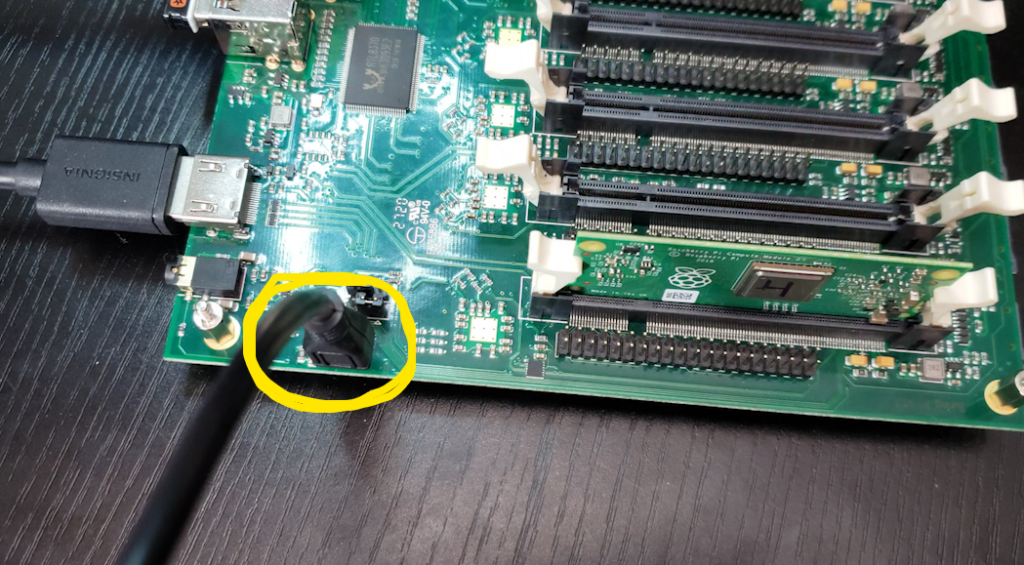
Next, plug in the micro USB cable into the USB slave port:

Once you’ve got that, download, install, and open the RPI_Boot.exe file. When that is open, you should see a terminal screen like this:

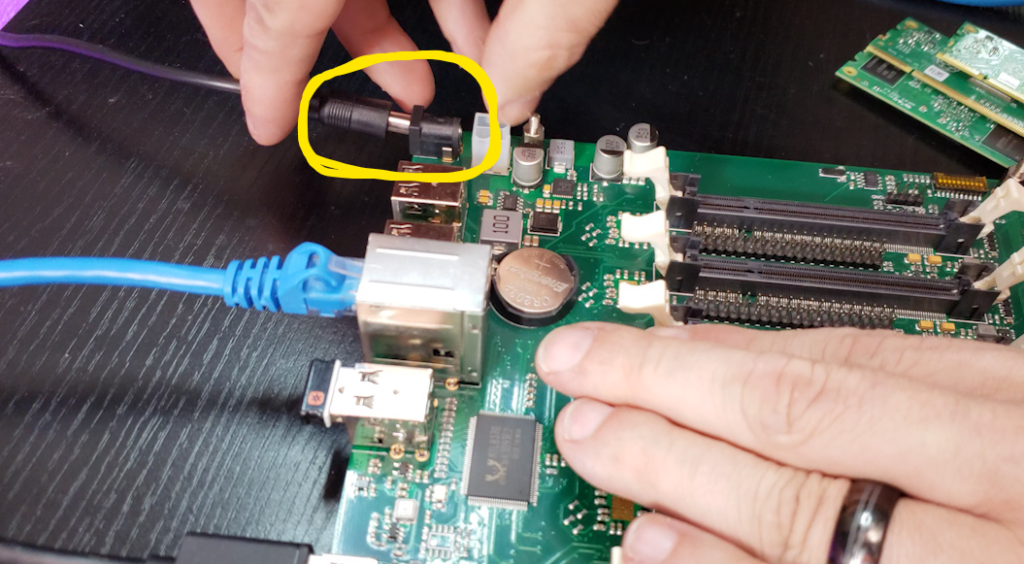
At this point, you can plug in the power to the Turing Pi.

The RPI_Boot.exe screen will flash some code and then the screen will close. You should now see an addition drive in your “This Computer”. You might see a couple of them depending on whether or not they’ve been flashed in the past. If you see more than one, you can open Disk Manager on your system and clear the partitions. After you’ve done that, you can flash an operating system onto your compute unit. I flashed Hypriot onto each of my compute units. I like Hypriot because it’s got Docker pre-installed.
Flashing SD Cards
If you’re using compute units without an eMMC chip, you’ll need to flash micro SD cards instead. You should be able to just plug your microSD card into your card reader and flash an operating system directly to the card. This process should be considerably faster than flashing an eMMC chip.
SSH Access
With either of these methods, you’ll want to reconnect the device after the flash is complete. This is so you can create an empty file on the root of the device called SSH. This will enable SSH by default so you don’t have to have a mouse and keyboard plugged in. I’ve just created the file on my main desktop and then, while the node is accessible via USB or plugged-in microSD card, I drop the file in the root of the “boot” drive.
Getting Ready
Once your operating systems are flashed you’ll want to go through the following steps with each compute unit:
- Plug the compute unit (and SD card as necessary) into slot 1.
- Make sure the jumpers aren’t staggered.
- Make sure you have a network cable plugged in
- Optional: Plug a monitor in via HDMI so you can see when the boot sequence is complete.
- Login to your network router to get the IP address of each node and make note of them.
- Login to each of your nodes via SSH and change their hostname. I named mine: cm1, cm2, cm3, etc…
Setup Swarm
Make sure that you’ve plugged all the nodes and microSD cards into the Turing Pi and you’ve powered it on. Give the system a few minutes to boot up and get ready.
Initiate Docker Swarm
Login to node 1 and type in the following command
- sudo docker swarm init –advertise-addr 192.168.68.192 (Your node 1 IP)
Generate Manager Token
Login to node 1 and type in the following command
- sudo docker swarm join-token manager
Login to the nodes you want as managers and copy results into the nodes’ SSH terminal window.
Generate Worker Token
Login to node 1 and type in the following command
- sudo docker swarm join-token worker
Login to the nodes you want as workers and copy results into the nodes’ SSH terminal window.
Confirm
Here you can verify that all of your nodes are connected.
- sudo docker node ls
Swarm Visualizer
I like to have a swarm visualizer on the system so I can monitor each node and see what applications are being run on each node.
Click the link and copy contents into your SSH terminal:
- https://github.com/dockersamples/docker-swarm-visualizer#running-on-arm
Create docker-compose.yml
Here’s a demonstration of the Bookstack docker-compose file for your cluster.
- sudo nano docker-compose.yml
- Copy/Paste this into the docker-compose file:
- Save and Exit
Deploy stack
Now you can run this command to deploy the service.
- docker stack deploy –compose-file docker-compose.yml bookstack
You can run this command to see the status of your swarm services:
- docker service ls
You’ll know that a service is ready when it says 1/1 under the Replicas column.
Scale Service Fix
If services get stuck (they do that sometimes) you can run this to fix hung up application deployment:
- docker service scale bookstack_bookstack=2
- docker service scale bookstack_bookstack=1
The first command will force the container to replicate to a second node. When it does that it seems to force the first node to finish. Then I run the second command to remove the unwanted node.
You can also run the commands to duplicate a container across multiple nodes to have them share the workload of that application.
Accessing Applications
Deploying an application may be a bit slower than on a server with a desktop processor, but when the container is ready, you can access if by going to http://node-1-ip:/port-number.
Additional Products in the Video
- MicroITX Case (Affiliate Link): https://amzn.to/33gIwY4
- 120mm Fan 5V USB Fans (Affiliate Link): https://amzn.to/33hPlbL
- SSD (Affiliate Link): https://amzn.to/3cITdpv
- SSD USB Interface (Affiliate Link): https://amzn.to/3l735fP (I’m only using the USB interface. I shucked the body)

