In this video we’ll look at How to Install QBittorrent with a VPN on OMV/Docker.
Prerequisites
The process is pretty easy and straightforward, but you’ll need a VPN account in order for this to work. I’ll be using Private Internet Access (PIA).
There are several other providers that will work with this.
Here’s a blog post that has some other options, but you can search for more by Googling “OpenVPN Providers”: https://www.vpnranks.com/best-vpn/openvpn/
Original Source: https://hub.docker.com/r/markusmcnugen/qbittorrentvpn
Your VPN provider needs to offer .ovpn files to download. PIA offers that in their wiki so that’s what I’ll be using. Installing QBittorrent with a VPN We’re going to do this in Stacks, so open Portainer and create a new Stack. Paste this in your Stack:
---
version: "2"
services:
  qbittorrentvpn:
    image: markusmcnugen/qbittorrentvpn
    container_name: qbittorrentvpn
    privileged: true
    environment:
      - VPN_USERNAME=vpnusername
      - VPN_PASSWORD=vpnpassword
      - PUID=998 #optional
      - PGID=100 #optional
      - WEBUI_PORT_ENV=8080 #optional
      - INCOMING_PORT_ENV=8999 #optional
      - VPN_ENABLED=yes
      - LAN_NETWORK=192.168.1.0/24
      - NAME_SERVERS=8.8.8.8,8.8.4.4
    ports:
      - 8080:8080
      - 8999:8999
      - 8999:8999/udp
    volumes:
      - /srv/dev-disk-by-label-Files/Config/QBittorrentVPN:/config
      - /srv/dev-disk-by-label-Files/Torrents:/downloads
    restart: unless-stopped
Don’t forget to name your Stack.
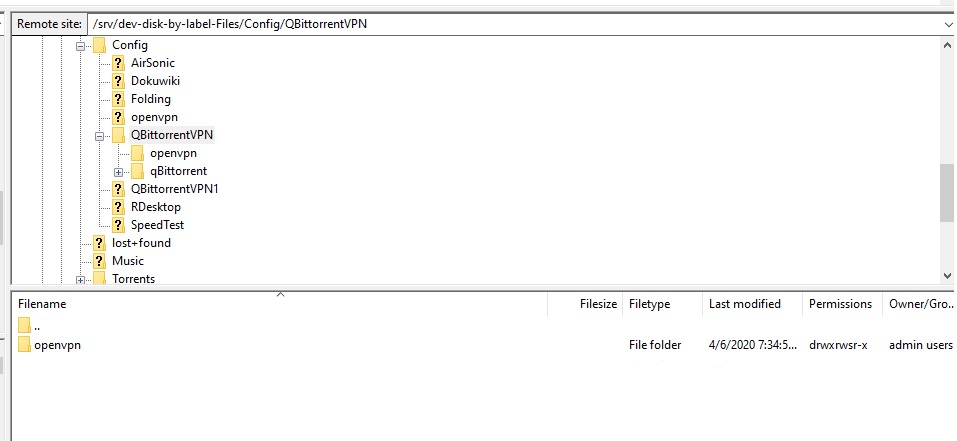
You’ll need to change a few values like your PUID, GUID, Config folder and Download folder absolute paths. Once you’ve got the schema setup correctly, click the “Deploy Stack” button and wait a bit. Open the logs for the container and you’ll see that it’s missing some .ovpn files.  Open Filezilla and login to your server as root on port 22. Then navigate to the Config folder’s absolute path. It should look something like this:
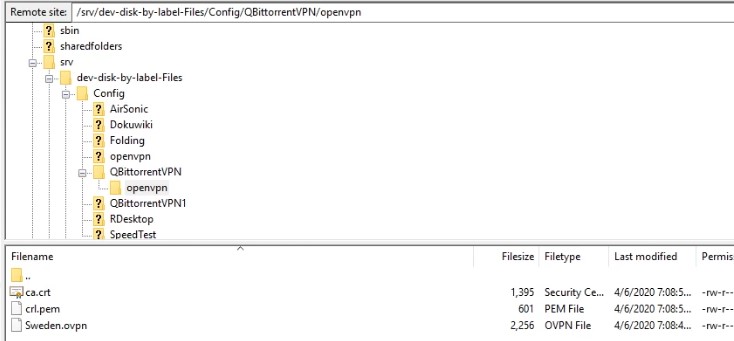
  Now, go back to the .ovpn files you downloaded from your VPN provider. There may be several files in there, each for a different connection location. Pick the location that you want to connect to and drop that folder IN the “openvpn” folder. Also, you should have a “ca.crt” file and a “crl.pem” file. Copy those over as well. In the end, you should have something like this:
  Once you’ve got that, you can go back to your QBittorrent container and click “start”. At that point, everything should connect and be good to go.
Troubleshooting
If you run into slow speed issues, you can try other .ovpn files/locations by stopping your QBittorrent container, FTPing back into your server, and navigating to where you placed the .ovpn file originally. Delete the .ovpn file that is there and upload a different location’s .ovpn file. Then go back to your Portainer and restart the QBittorrent container.
Other OpenMediaVault Tutorials
If you’re interested in other tutorials for your home server, check here: https://dbtechreviews.com/category/openmediavault/
/=========================================/
Like what I do? Want to be generous and help support my channel?
Here are some ways to support:
Patreon: https://dbte.ch/patreon
Ko-fi: https://dbte.ch/kofi
/=========================================/
Remember to leave a like on this video and subscribe if you want to see more!
/=========================================/
Follow Me:
Twitter: https://dbte.ch/tw
Facebook: https://dbte.ch/fb
Subscribe: https://dbte.ch/ytsub

