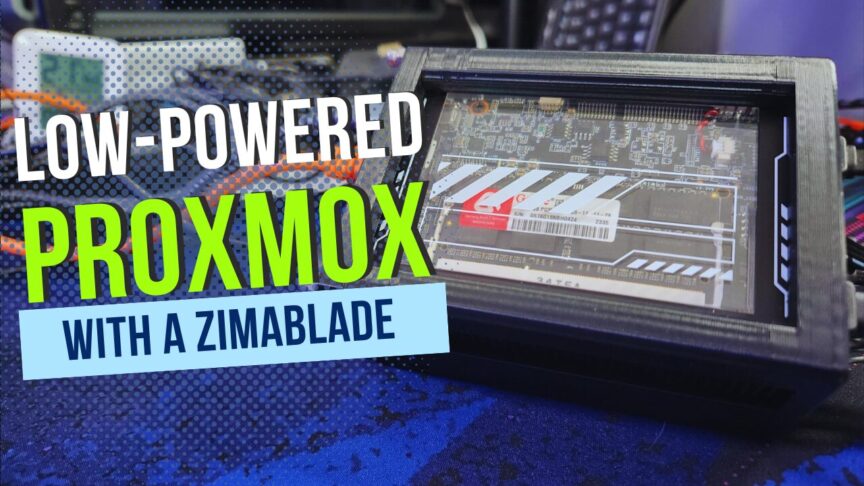
Hey there! Thank you so much for stopping by. I really do appreciate it. I’ve been wanting to do this project for a little while and thought I would make a quick blog post about it, bringing you along for the ride.
So, I’ve had a Zima blade since before they were even first released to the public, and I made an unboxing video of it. Well, a livestream is actually what that was. I had lots of plans to make other content but didn’t follow through. However, now I’ve got some content that I want to create, and I want to use this Zima board to set up a little Proxmox server, just because I can. I wanted to take you guys along for the ride.
The Hardware Setup
Here’s the little hardware setup we’re going to use. This is the Zima blade that I’m going to use. It’s the four-core, four-thread version with 8 gigs of DDR3 RAM. There is a 16-gig module available from Ice Whale now for around $40, and I’m really thinking about getting that.
I’ve got this Zima blade in a 3D-printed enclosure that I found online. I printed it yesterday, and it didn’t take long, but that’s probably dependent on your printer versus mine.
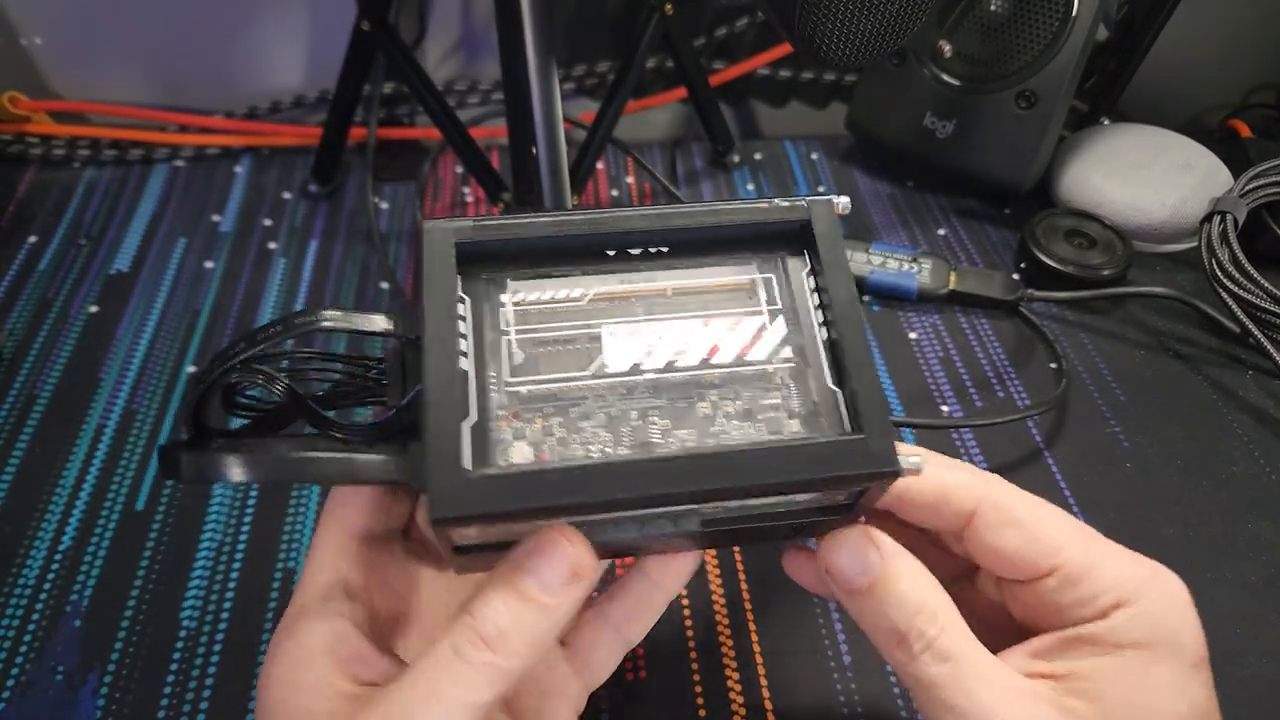 I’ll put a link to this little enclosure in the blog post. Underneath it, you can see that I’ve got two 1TB SSDs. We’re going to use those for storage.
That’s basically it for the hardware. However, I will have to use a little breakout board to plug into the PCI express slot so that I can have more than just the one USB port while doing the installation.
I’ve got two USB drives here. One is a 128GB, and the other is a 64GB. I’m going to use the 128GB version as my Proxmox boot drive and the 64GB for my installation media for Proxmox.
Very simple, very small little package. I actually really dig this little case. I had to modify it a little bit to get it to work, as you can see here and there, and then I sanded it. That’s why it looks like this on this end.
But this is what I’m going to use for this little setup. I had it lying around and hadn’t really made any content other than the unboxing livestream that I did when I first got it. So I thought, let’s do something fun with the Zima blade.
Getting the Proxmox ISO
Now that we’ve taken a look at the hardware we’re going to use, the next thing we need to do is get our boot media configured. And, of course, the first thing we have to do before that is make sure that we’ve got the most current ISO of Proxmox.
So, let’s head over to proxmox.com and go to the downloads page. From there, we can just download the Proxmox VE 8.2 ISO installer. Of course, that version number may vary depending on when you’re reading this blog post. You’ll just want to go with the most current version, and hopefully, they haven’t changed too much by the time you see this.
Once the ISO has finished downloading, we can move on to creating our bootable media.
Creating the Bootable Media
Now that we have our ISO downloaded, we need to create our bootable media. To do that, I’m just going to use a little USB drive here. I think this is a 64GB drive. It doesn’t need to be that big; it’s just what I have lying around.
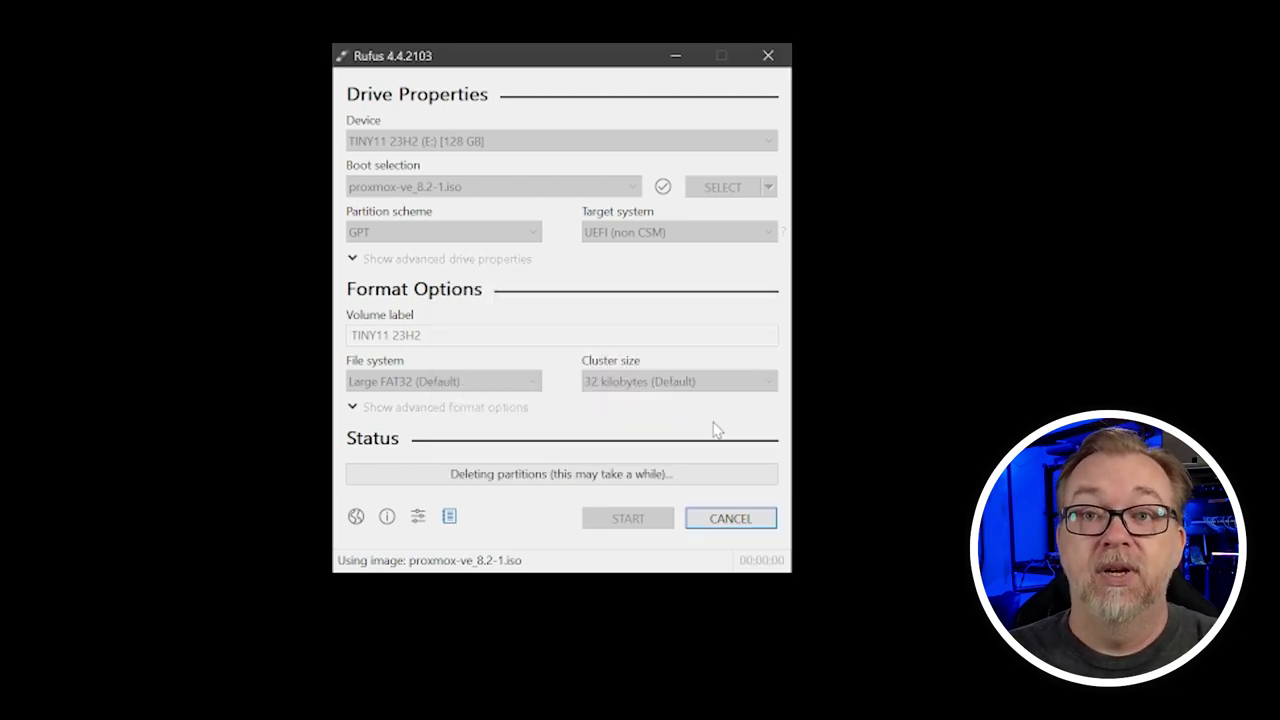 I’m going to use Rufus to create the bootable media. I’ve used it in the past, and it works really well. So, let’s open up Rufus and plug in our USB drive.
Rufus makes it really easy to create bootable media. I highly recommend using it for this kind of task.
Under “Boot selection,” we’ll select “Disk or ISO image” and then choose our Proxmox ISO file that we downloaded earlier.
 Once that’s done, we can click “Start” and confirm that we want to destroy any data on the USB drive.
We’ll give this a couple of minutes to create the bootable media, and then once it’s done, we’ll move over and get this plugged into our Zima blade so that we can get Proxmox installed.
Installing Proxmox
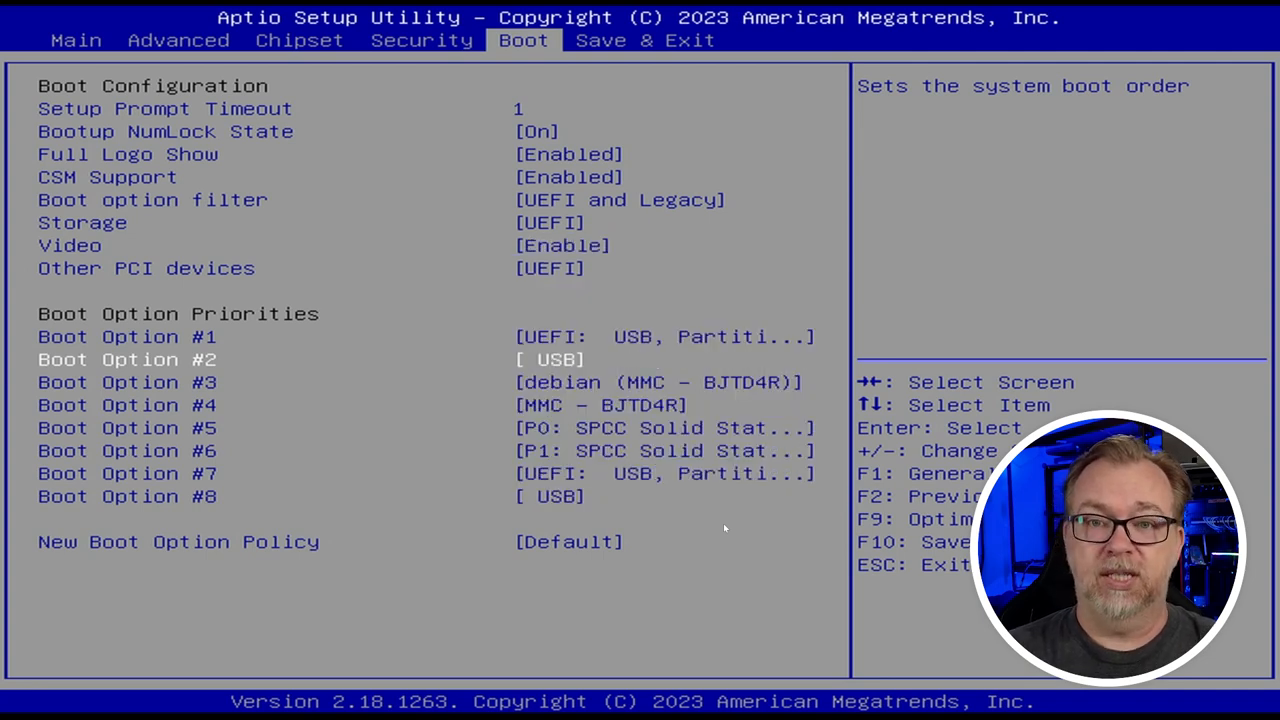
Okay, so now we’ve got our bootable USB drive plugged into the Zima blade. We’re going to start tapping the “Delete” key to get into the BIOS so that we can change the boot order and boot from our USB drive.
 Once we’ve got that set up, we can save the changes and exit the BIOS. Grub should load up, and we’ll be presented with a couple of options. I like to be lazy, so we’re going to select the Proxmox graphical installer.
You should read the EULA (End User License Agreement), and if you agree, click “I agree.” Then, we’ll select our bootable media (the USB drive) and click “Next.”
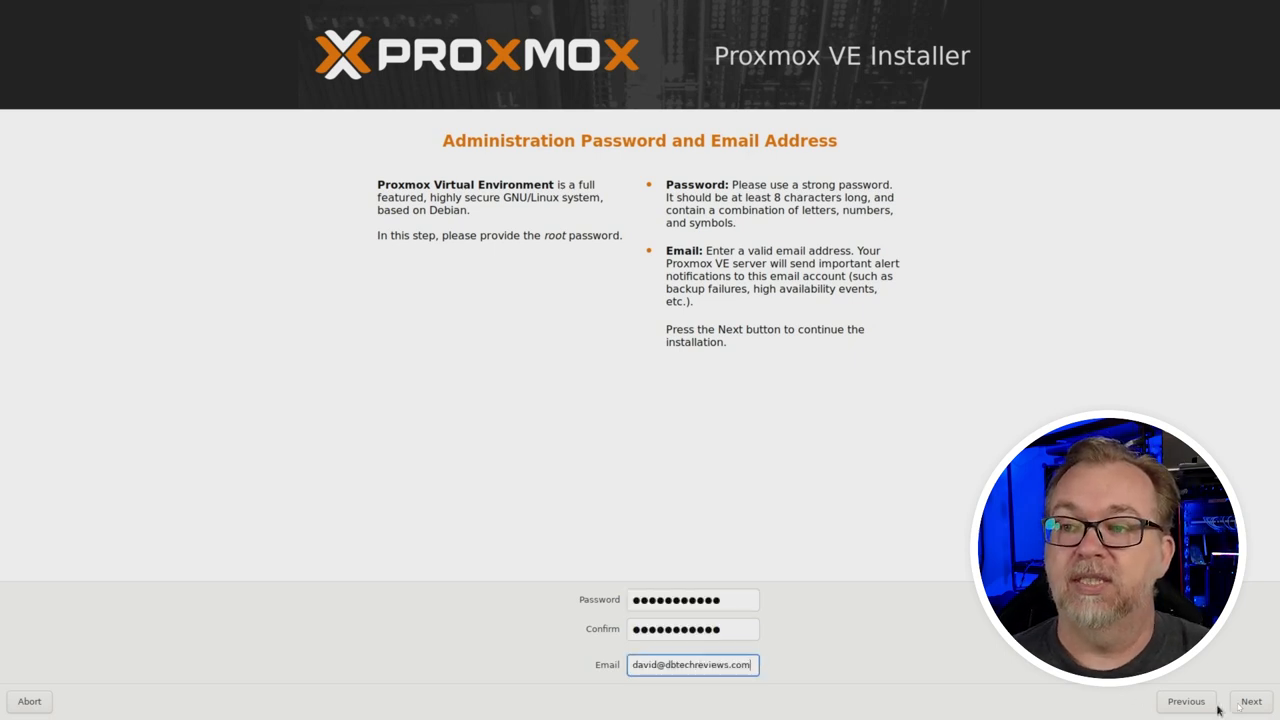
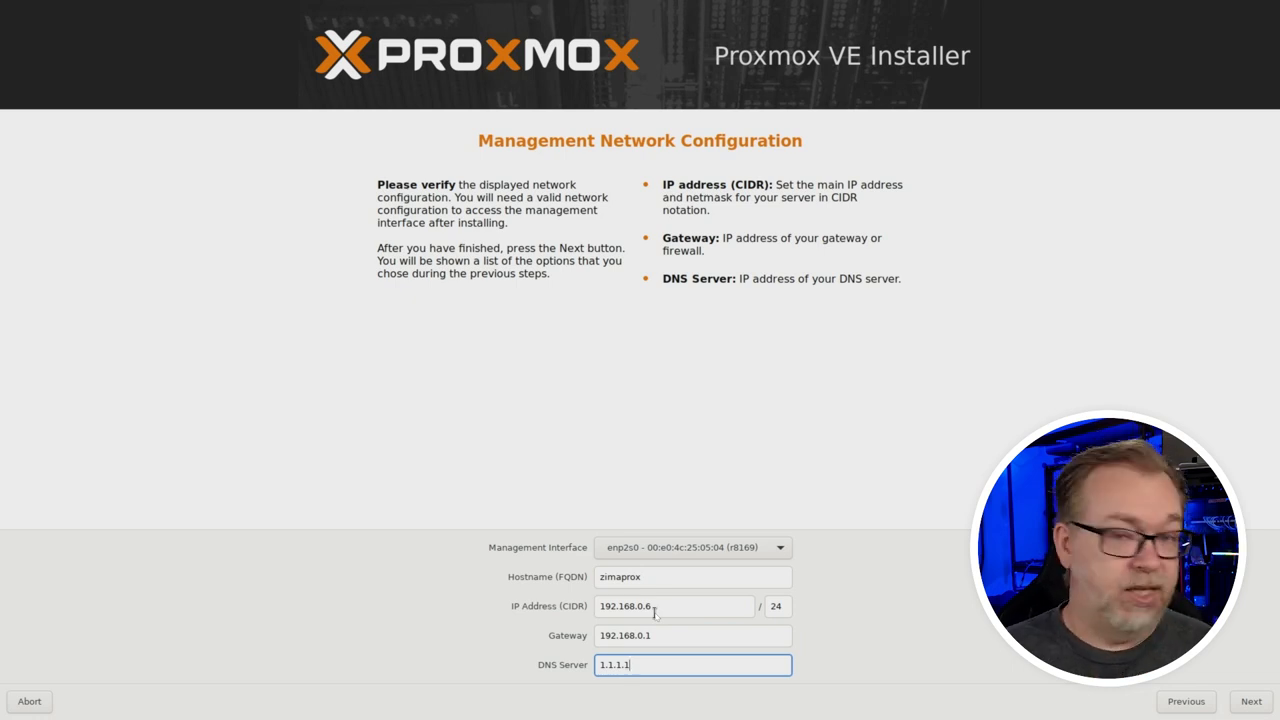
We’ll go through the rest of the installation process, setting our country, time zone, password, email address, and so on. One thing to note is that the IP address it suggests may not be correct. Since the release of the Proxmox 8 series, this has been randomly throwing in whatever IP address it wants.
So, you’ll want to go back and select an IP address that you know is available on your network.
 Once you’ve got everything set up correctly, you can click “Install,” and Proxmox will do its thing. This will take a few minutes, and then we’ll be able to log in to our Zima blade’s Proxmox setup.
Logging In and Configuring Storage
After the installation is complete and the system reboots, we can quit doing everything via the capture device and jump into a browser window to do this for real.
We’ll go to the URL that it’s got up there, making sure to include the “https://” and the port “:8006” at the end. For example, https://192.168.1.100:8006.
You may get a warning about the connection not being private. Just click “Advanced” and then “Proceed” to continue.
You’ll be prompted to log in with the username “root” and the password you set up during the installation process.
Now, the first thing we want to do is actually get our storage configured. We’ve got the 128GB boot drive on the USB, and we’ve also got two 1TB drives that we want to set up so that we can get the best possible speeds out of our storage.
To configure our storage, we’ll follow a few steps:
- Go to “Disks” and wipe both of our 1TB SSDs (
/dev/sdaand/dev/sdb) to ensure they’re clean and ready to be used. - Go to “ZFS” and click “Create: ZFS.”
- Give it a name like “storage.”Select both of our 1TB SSDs.Change the “Mode” from “Single disk” to “Mirror.”
- Download a template for creating containers.
- Go to the "Shell" section.
- Run `pveam update` to update the available templates.
- Run `pveam available` to see a list of available templates.
- I like to use the Debian turnkey core edition for my container templates, so I'll note down the template ID for that.
- Run `pveam download local <template_id>` to download the template to our local storage.
- Verify that the template is available.
- Go to “Create CT” (Create Container).
- Under “Template,” you should see your downloaded template listed.
And that’s it! We’ve now got our Proxmox server set up on the Zima blade, with storage configured and a template downloaded, ready for us to start creating containers and doing more fun stuff in future videos or blog posts.
If you enjoyed this content, don’t forget to leave a like and subscribe if you haven’t already. You can also support the channel by becoming a channel member or a patron, which will give you access to my content with no ads for as little as $1 a month.
Thank you again for spending a few minutes of your day with me. I’ll talk to you in the next one!