In June of 2018 a developer going by hunterlong on Github pushed the first bits of code for a service called StatPing.
Over the next couple of years, until around December of 2020, statping was being maintained by hunterlong and a team of around 30 others.
At that point, statping remained dormant until August of 2021 when adamboutcher forked the repository and started developing and maintaining statping-ng.
New versions of statping-ng were being released until around March of 2022 when the service hit version 0.90.80.
At that point statping-ng received no further releases until May of 2023. But the devs have advised to NOT update to this version.
Updates and changes to the service are still happening, but at a bit of a slower pace for the time being.
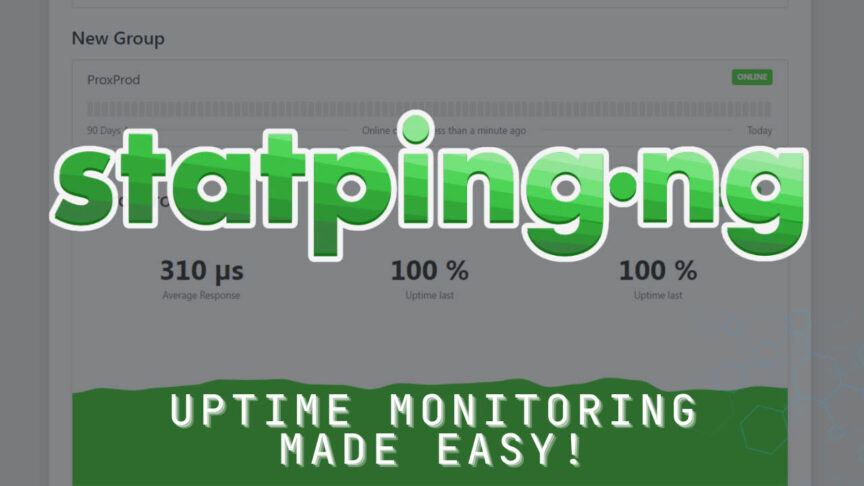
Statping-ng is a Status Page for monitoring your websites and applications with graphs, analytics, and plugins.
Basically, think of it as an alternative to UptimeKuma with some different options.
Please don’t think of this as me telling you NOT to use UptimeKuma. This is just me showing an alternative that might be a better option for some people.
So let’s take a look around statping-ng and then we’ll take a look at installing it.
Home Page
With statping-ng, you get a home page with information about service failures, response times, uptimes, and a graph showing showing historical response times so you can easily see if there are any anomalies.
At the bottom of that page, you’ll get access to a dashboard where you can see all your services listed out with some general information including events, uptime, incidents, checkins, and failures.
Dashboard
By clicking “Incidents” at the bottom of each service, you can create a note letting people what’s going on with that service.
With checkins, you can tell your service to send a GET request to a specified URL in StatPing. You can also use a CRON job to accomplish this task and StatPing-NG even gives you the cronjob script to configur it. Each time Statping-NG receives a ping from your service, it knows your service is up and running. If Statping-NG doesn’t receive this message within the expected time frame (like if your service was set to send a message every 30 minutes but it’s been longer than that), it will alert you that there might be an issue with your service.
While checkins aren’t necessary for things to run, they are an additional way of checking on your service.
Going back to the previous page and clicking failures, you’ll see exactly that: Failures. It will also tell you how many failures you’ve had and what it is that failed so you can investigate what’s going on.
Services
Moving over to the Services tab across the top of the page, you can create groups for your services, change the order of those groups, and, of course, add the services you want to manage.
When you create a new service, you’ll enter a few different pieces of information.
You’ll give it a name.
You’ll add what service type it is. Basically, is this an HTTP service, a TCP service, a UDP service, etc.
You can add the service to a group for easier organization.
You’ll add a permalink URL (basically a URL slug).
The public service toggle is to tell the system if you want this service to be published on the public dashboard.
You can tell it how often you’d like to check on the service with the “Check Interval”
Next you’ll enter the endpoint for the service. This might be a URL or IP address.
You’ll set the check type, whether that’s a GET, POST, DELETE, etc.
Next is the timeout so you can set how long StatPing should wait before deciding the service is offline.
Then you’ve got the ability to set HTTP headers and Expected Response codes to fit your needs.
You can tell the statping to follow redirects if that’s something you need, and you can have statping verify the SSL.
Lastly on this page, you can decide if you want to receive notifications on the service you’re monitoring.
We’ll come back to notifications in a bit.
Users
The next tab across the top is to create and manage users. You can set usernames, emails, and passwords here as well as deciding if the user is an administrator or not.
At the top of the page, you’ll be able to see when each user last logged in and you can edit the user from there as well.
Announcements
Next we’ve got announcements. They’re as simple as that. You can create global announcements or annoucements for individual services that you’re monitoring.
You’ll give it a title, a description, and set a date range for the announcement. You can even set the announcement to notify users ahead of the scheduled time.
Settings
The settings page looks like it’s got a lot going on, but it’s not too bad.
You can change the name and description of your statping service. You can also change the URL, enable a CDN, add footer text to your instance, change the language and send error reports back to the devs to help them with developing statping.
There is also an API section on the page, so if you need an API key for managing your statping instance, you can find that here as well.
Down the left side of the page, we’ll find a few more menu items. The next one down is “Theme”.
In the theming section, you can completely customize your Status Page using SASS styling with easy to use variables. The container image actually contains a pre-built SASS binary so you won’t even need to setup anything!
After that we’ve got “Authentication”. You can use the built-in authentication or you can use a 3rd party system like Github, Google, Slack, or a custom oAuth provider.
If you want to export or import your settings, the “Import” tab will be where you want to go to do those things.
Next we’ve got “Configuration”. But, when you get there, the page will look blank. Click inside the box and some text will magically appear. You can use this section to make a few changes to your setup.
Notifiers
Most of the rest of the page is about setting up notifications. There are multiple options here including:
- Slack
- Mattermost
- Command
- Discord
- SMTP Mail
- Line
- Telegraph
- Twilio
- Webhooks
- Mobile notifications (if you use the compatible statping app)
- Pushover
- Gotify
- Amazon SNS
There is also a page of variables you can use in your notifications if you want to get detailed information in your communications from statping.
Logs
Going back to the top menu and clicking on “Logs” will show you the logs of your statping server so you can find any information you may need for troubleshooting or whatever else You use logs for.
Help
The Help menu item will take you to a list of different topics you can choose from to get more information.
Logout
The last item across the top of the page is just a simple logout link.
Installation
Now that we’ve gone through the application, let’s take a quick look at installing it via Docker.
Now, we’re going to go with a simple installation using a simple sqlite database, but there are more complex options available statping-ng wiki.
We can use a few different methods to installing, but we’re going to use Dockge (I’m still calling it Dockage. I was given permission by the dev).
If you head over to the statping-ng Docker wiki, you’ll find a Docker command that you can deploy statping with.
Any of the options on that page should work, but I’m going to use the “Mounting Volume” version. I’m just going to click the “copy” icon and head back over to Dockge.
Then I’ll paste that in the Docker Run text box and click “Covert to Compose”
On the new page that loads, I’m going to give the stack a name and make sure that the docker-compose on the right side of the page looks good.
It’s mostly fine, but I do want to change a couple of things.
First, we’ll change the port to something other than 8080. To do this, we’re only going to change the FIRST 8080 on the line with the ports. Don’t change the colon or anything after it.
Next, I want to change the volume. You could map this to a folder on your system, but there’s really nothing you need to access easily in the application’s code, so I’m going to change this to a Docker volume.
I’ll change the volume line to just be statping:/app
and then after the network line, I’m going to define the Docker volume with “volumes:” and then a new line, a couple of spaces, and then “statping:”
Once I’m happy with everything I’m going to click Save and then Deploy.
After a moment, the container should come up and be ready to configure.
Now, I know not everyone is using or wants to use Dockge, so you can take the docker command we copied from the statping-ng Docker wiki and either deploy it via command line as it is or you can head over to some place like composerize.com and convert the command to a docker-compose and deploy it via Portainer or whatever other method you want.
Configuration
Once statping-ng is deployed, we can go over to the IP address and port that you deployed it on.
You’ll be asked to fill out the basic information about your setup including the language, database type, status page name, description, Domain (URL or IP) and the primary admin user account.
You can also enter your email address and decide if you want to get notifications about major release updates.
Once you’re happy with all of that, you can click “Save Settings”
First Login
Once the page reloads, you’ll be logged in and there will be some default data already loaded in so you can have a bit of data to get you started.
You’ll probably want to delete all this data and start entering your own servers, applications, and whatever else you want to monitor with StatPing-NG.
Helping Out
If you’re looking to help or support StatPing-NG, there are a few ways you can do that.
The first, and easiest way to do it is to give the project a star on Github. At the time of writing, the repository has 996 stars. Let’s see if we can blow that number up a bit.
Also, based on a post from Adam back in March of 2023, they are looking for maintainers and testers.
If you’d like to help out the DB Tech channel, there are a few ways you can do that, too. You could like and subscribe if you haven’t already. If you’d like ad-free access to my content, you can join my Patreon or become a channel member here on YouTube.
We’ve also got a Discord you can check out if you want to chat with other tech enthusiasts.
I hope you enjoyed this look at StatPing-NG. Let me know what you think in the comments down below.
Also, as always, links to everything will be in the description below the video.
So, with all that said, I’m going to wrap this up. I want to thank you for spending a few minutes of your day with me today, and I’ll talk to you in the next video.
Links
https://github.com/statping/statpinghttps://github.com/statping/statping/releaseshttps://github.com/statping/statping/releases?page=21
https://github.com/statping-ng/statping-ng/releases
https://github.com/statping-ng/statping-nghttps://github.com/statping-ng/statping-ng/wikihttps://github.com/statping-ng/statping-ng/wiki/Docker
https://github.com/statping-ng/statping-ng/pull/178#issuecomment-1490907270